Table of Contents
ToggleBathrooms have long been the overlooked space in home design, but that’s changing fast. Luxury bathroom wallpaper has emerged as one of the most effective ways to elevate a powder room or primary bath from functional to unforgettable. Unlike paint, wallpaper introduces pattern, texture, and depth that can make even a compact half-bath feel like a designer showroom. With modern materials engineered to handle moisture and humidity, homeowners no longer need to choose between durability and high-end aesthetics. This guide walks through everything needed to select, install, and style luxury wallpaper in a bathroom, without the guesswork or costly mistakes.
Key Takeaways
- Luxury bathroom wallpaper transforms small or overlooked spaces with pattern and texture that paint cannot replicate, while modern moisture-resistant materials ensure durability in high-humidity environments.
- Vinyl and non-woven wallpapers are the best materials for bathrooms; avoid traditional paper-backed options that absorb moisture and peel.
- Strategic placement on a single accent wall—typically behind the vanity or tub—maximizes visual impact without overwhelming the room with bold patterns.
- Proper surface preparation, including wall cleaning and moisture-resistant primer application, is critical to prevent peeling, warping, or mold growth.
- Metallic, botanical, and textured wallpaper styles dominate 2026 luxury bathroom trends, with pattern scale and color coordination essential for complementing existing fixtures and tile.
- Professional installation may be worthwhile for complex layouts, as improper hanging leads to visible seam mismatches and wasted material.
Why Choose Wallpaper for a Luxury Bathroom?
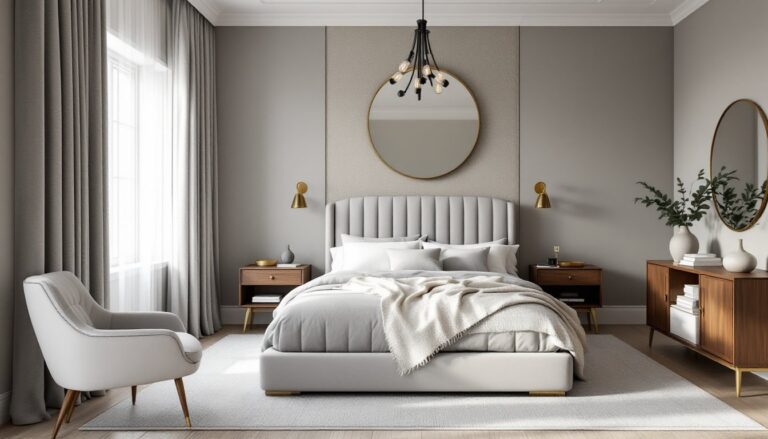
Wallpaper delivers visual impact that paint simply can’t match. A single statement wall behind a vanity or tub can anchor the entire room’s design, creating a focal point that draws the eye and elevates perceived value. This is particularly useful in smaller bathrooms where floor and counter space are limited, vertical surfaces become prime real estate for design expression.
From a practical standpoint, modern vinyl-coated and non-woven wallpapers are engineered to resist moisture, mildew, and steam. These aren’t the paper-backed rolls from the 1970s that peeled at the first sign of humidity. Today’s bathroom-rated wallpapers include washable finishes and moisture barriers that hold up in high-humidity zones, including full baths with showers and tubs.
Wallpaper also allows for rapid transformation without major construction. Unlike tile work, which requires demolition, underlayment, and grout curing time, wallpaper installation can be completed in a weekend by a confident DIYer. It’s a cosmetic upgrade that doesn’t require permits, plumbing adjustments, or structural changes, making it one of the most accessible luxury upgrades available.
Finally, wallpaper offers unmatched variety. From hand-painted chinoiserie to geometric Art Deco patterns, the range of designs far exceeds what’s available in tile or paint. This makes it easier to align a bathroom’s aesthetic with the rest of the home or to create a dramatic departure that turns a small space into a conversation piece.
Top Luxury Bathroom Wallpaper Styles and Trends
Choosing a wallpaper style sets the tone for the entire space. In 2026, several design directions dominate the luxury bathroom market, each offering distinct visual and tactile qualities.
Metallic and Textured Wallpapers
Metallic wallpapers remain a favorite for powder rooms and guest baths. Gold, brass, and silver foil accents catch and reflect light, making small spaces feel larger and more luminous. Grasscloth-textured papers with metallic threading add depth without overwhelming the room. These work especially well in bathrooms with minimal natural light, where the reflective surface compensates for the lack of windows.
Textured wallpapers, such as faux linen, embossed damask, or 3D geometric patterns, add a tactile dimension that flat paint can’t replicate. These materials create shadow play throughout the day as light shifts, giving the room a dynamic quality. Be aware that heavily textured papers can be harder to clean in high-splash zones, so reserve them for areas away from the shower or tub surround.
When selecting metallic or textured papers, confirm they’re rated for bathroom use. Look for vinyl-coated or acrylic-coated finishes that allow for wiping down condensation and minor splashes. Papers labeled “scrubbable” will hold up better than those marked only “washable.”
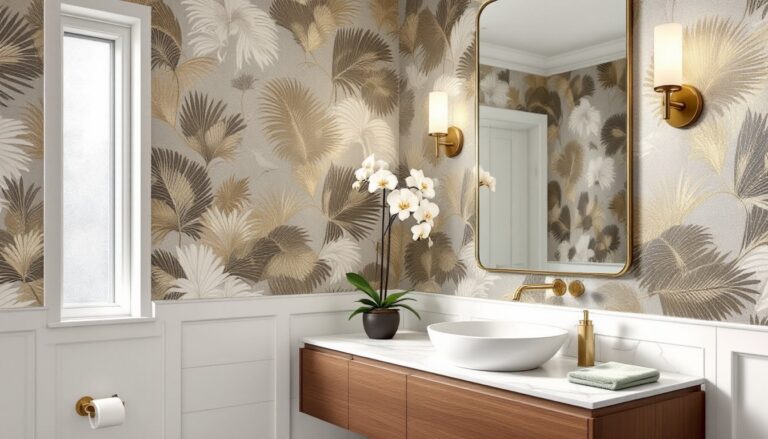
Natural and Botanical Patterns
Botanical prints have moved beyond traditional florals into more sophisticated territory. Large-scale palm fronds, tropical leaves, and watercolor botanicals are trending in primary baths, especially those with spa-like design goals. These patterns pair well with natural wood vanities, stone countertops, and matte black or brass fixtures.
Chinoiserie and hand-painted mural-style papers offer a more formal take on botanical themes. These often feature birds, branches, and blooms in stylized compositions that feel more like fine art than decoration. They’re particularly effective in powder rooms where guests linger and can appreciate the detail.
For a subtler approach, consider tonal botanical prints, designs where the pattern and background share a similar color value, creating texture without high contrast. These work well in bathrooms where the vanity, tile, or fixtures already provide strong visual interest. Many homeowners reference luxury interior design trends to ensure their botanical choices align with current high-end aesthetics.
Choosing the Right Wallpaper Material for Bathrooms
Material selection is critical in a bathroom. The wrong paper will peel, warp, or develop mold within months. Here’s what works, and what doesn’t.
Vinyl wallpaper is the workhorse for bathrooms. It’s water-resistant, scrubbable, and available in both solid vinyl (fully synthetic) and vinyl-coated (paper backing with a vinyl surface). Solid vinyl offers the best moisture resistance and is the go-to choice for full baths with tubs or showers. Vinyl-coated paper works well in powder rooms or half-baths with lower humidity.
Non-woven wallpaper is made from a blend of natural and synthetic fibers, creating a breathable yet durable surface. It’s easier to install than traditional paper because it doesn’t expand when wet, reducing the risk of bubbles and misalignment. Non-woven papers are also strippable, meaning they peel off in full sheets during removal, which simplifies future remodels. Many design sourcebooks highlight non-woven options for their balance of aesthetics and practicality.
Peel-and-stick wallpaper has improved significantly in recent years. Modern versions use repositionable adhesive that won’t damage drywall, making them ideal for renters or homeowners who like to refresh their decor frequently. But, peel-and-stick is best reserved for powder rooms or low-humidity areas. In steamy full baths, the adhesive can fail, especially along seams.
Avoid traditional paper-backed wallpaper in any bathroom. These absorb moisture, swell, and eventually delaminate. Fabric-backed grasscloth can work in powder rooms with good ventilation, but it’s not recommended near showers or tubs.
Always check the manufacturer’s specifications. Look for terms like “bathroom-rated,” “moisture-resistant,” or “mildew-resistant.” If the product description doesn’t explicitly mention bathroom use, it’s not engineered for that environment.
How to Install Luxury Wallpaper in Your Bathroom
Installing bathroom wallpaper is a manageable DIY project if the prep work is done right. Rushing through surface preparation is the most common cause of failure.
Materials and Tools:
- Bathroom-rated wallpaper (order 10-15% extra for pattern matching and errors)
- Wallpaper adhesive (if not pre-pasted)
- Primer/sealer rated for high-moisture areas
- Smoothing tool or plastic squeegee
- Utility knife with fresh blades
- Level and measuring tape
- Sponge and clean water
- Safety gear: gloves (some adhesives irritate skin), utility knife safety (always cut away from yourself)
Step-by-Step Process:
-
Prep the walls. Remove old wallpaper, patch holes with spackle, and sand smooth. Walls must be clean, dry, and free of grease or soap residue. Wipe down with a TSP (trisodium phosphate) solution or a degreasing cleaner, then rinse.
-
Prime the surface. Use a moisture-resistant primer or a wallpaper-specific primer-sealer. This creates a uniform surface for adhesion and makes future removal easier. Let the primer dry fully, typically 24 hours in a bathroom with limited airflow.
-
Measure and cut. Measure wall height and add 4 inches to each strip for trimming. If the pattern has a repeat, note the repeat distance (usually listed in inches on the product spec) and plan cuts so patterns align at eye level.
-
Apply adhesive (if needed). For pre-pasted paper, follow the manufacturer’s instructions, usually a quick water tray soak. For unpasted vinyl, roll adhesive onto the back or directly onto the wall (“paste the wall” method is easier for beginners).
-
Hang the first strip. Start in the least visible corner or behind the door. Use a level to ensure the first strip is plumb, this sets the alignment for the entire wall. Smooth from the center outward with a plastic smoother or squeegee, pushing out air bubbles.
-
Match the pattern. Align subsequent strips carefully, overlapping slightly if needed, then trim the excess with a sharp utility knife. Wipe away any adhesive that squeezes out immediately with a damp sponge.
-
Trim edges. Once the wall is covered, use a straightedge and fresh utility blade to trim excess at the ceiling, baseboard, and corners. Dull blades tear paper, change them often.
-
Seal edges (optional). In high-moisture areas, some pros apply a thin bead of clear silicone caulk along seams near the tub or sink. This isn’t always necessary with quality vinyl, but it adds an extra moisture barrier.
Ventilation is critical during and after installation. Run a bathroom fan or crack a window to help adhesive cure properly. Avoid hot showers for 48 hours to let everything set.
If the bathroom has extensive tile work, unusual angles, or a large footprint, consider hiring a professional wallpaper hanger. The cost (typically $2–$5 per square foot for labor) can be worth it to avoid seam mismatches or wasted material.
Design Tips for Maximizing Impact
Wallpaper placement and pattern choice can make or break a bathroom’s visual flow. Here’s how to get it right.
Accent walls work best. In most bathrooms, papering all four walls creates visual clutter, especially with bold patterns. Choose one focal wall, typically behind the vanity, opposite the entry, or behind a freestanding tub. This concentrates the design impact without overwhelming the space.
Scale the pattern to the room size. Large-scale patterns (24-inch repeats or more) can make a small powder room feel cramped. In compact spaces, opt for smaller, more intricate patterns or tone-on-tone designs. Conversely, a primary bath with high ceilings can handle oversized botanicals or dramatic murals.
Coordinate with existing finishes. Wallpaper should complement, not compete with, tile, countertops, and fixtures. If the vanity countertop is a busy marble, choose a simpler wallpaper pattern. If fixtures are matte black or brass, look for papers with metallic accents in the same finish.
Lighting matters. Metallic and glossy wallpapers need adequate lighting to shine. If the bathroom lacks natural light, add sconces or overhead lighting before installing reflective papers. In bathrooms with large windows, be mindful that direct sunlight can fade certain inks over time, UV-resistant coatings help.
Consider the ceiling. In powder rooms with standard 8-foot ceilings, wallpapering the ceiling can create a jewel-box effect. This works especially well with subtle patterns or metallic finishes. Skip this in full baths where steam accumulation is higher.
Balance color temperature. Warm metallics (gold, brass, copper) pair well with warm whites and wood tones. Cool metallics (silver, chrome) suit cooler grays and marble. Mixing warm and cool tones can create visual dissonance unless done intentionally with a skilled eye. Exploring home decor inspiration galleries can help visualize color pairings before committing.
Don’t forget grout and caulk. If wallpaper meets tile, ensure grout lines are clean and caulk is fresh. Yellowed or cracked caulk will undermine even the most expensive wallpaper.