Table of Contents
ToggleLuxury vinyl tile (LVT) with a stone look has become one of the smartest flooring choices for kitchens, offering the high-end appearance of natural stone without the cost, maintenance headaches, or installation complexity. Whether renovating on a budget or upgrading a rental property, homeowners are discovering that modern LVT delivers authentic textures, waterproof durability, and DIY-friendly installation. This guide walks through everything needed to select, install, and enjoy stone-look vinyl tile in the kitchen.
Key Takeaways
- Kitchen luxury vinyl tile flooring with a stone look delivers authentic aesthetics at a fraction of natural stone costs—typically $3–$7 per square foot versus $12–$18 for real stone installation.
- Stone-look LVT is 100% waterproof and requires only damp mop cleaning with no grout lines to scrub, annual sealing, or worry about spills etching the surface.
- Click-lock rigid-core vinyl tile offers DIY-friendly installation directly over most subfloors without mortar, tile saws, or extended curing periods.
- Modern 3D-printed stone patterns with embossed textures eliminate repeating visuals and deliver realistic marble, slate, travertine, and concrete looks that blend multiple color variations for authentic non-repeating appearance.
- A 5mm–6mm thickness with a 20 mil wear layer and Class 33+ rating provides durable performance for high-traffic kitchens, while proper acclimation, expansion gaps, and 10% material overstock prevent installation issues and enable future repairs.
Why Choose Stone-Look Luxury Vinyl Tile for Your Kitchen
Kitchens face constant exposure to moisture, dropped pots, spilled liquids, and heavy foot traffic. Natural stone like travertine, slate, or marble handles some of this abuse well, but at a premium price and with ongoing sealing requirements.
Stone-look LVT replicates the visual depth and texture of real stone through high-resolution imaging and embossed wear layers, all while sitting atop a waterproof vinyl core. The planks or tiles typically measure 12″×24″ or 18″×18″, with thickness ranging from 2mm to 8mm depending on whether it’s glue-down, click-lock, or loose-lay format.
Unlike ceramic or porcelain tile, LVT has a slight give underfoot, making it warmer and more forgiving on dropped dishes. It also installs directly over most existing subfloors, plywood, concrete slab, or even old vinyl, provided the surface is clean, flat, and dry. No mortar bed, no tile saw dust everywhere, and no three-day curing period before grouting.
For homeowners who want the look of a $12–$18 per square foot stone installation but can only budget $3–$7 per square foot in materials, LVT closes that gap without looking cheap.
Top Benefits of LVT Stone Flooring in Kitchen Spaces
Waterproof Protection and Easy Maintenance
Most rigid-core and WPC (wood-plastic composite) LVT products carry a 100% waterproof rating, meaning standing water from a dishwasher leak or an overflowing sink won’t warp, swell, or stain the planks. This makes LVT ideal for kitchens, mudrooms, and laundry areas where ceramic tile once dominated.
Cleaning requires nothing more than a damp mop and pH-neutral cleaner. No grout lines to scrub (if installed as full tiles without faux grout), no annual sealing, and no worries about acidic spills etching the surface. Spilled wine, tomato sauce, or olive oil wipe up without leaving ghosting or discoloration.
The wear layer, typically 12 mil to 20 mil on residential-grade products, resists scratches from chair legs, pet claws, and grit tracked in from the backyard. For high-traffic kitchens, look for a 20 mil or thicker commercial-grade wear layer and a Class 33 or Class 42 AC rating for added durability.
Realistic Stone Aesthetics at a Fraction of the Cost
Modern printing technology has eliminated the repeating patterns and plasticky sheen that plagued older vinyl sheet goods. Premium LVT lines now use 3D scanning of actual quarried stone, capturing veining, color variation, and even the subtle pitting found in limestone or slate.
Embossing registers with the printed image, so ridges align with grout lines or natural fissures in the stone pattern. When installed with tight seams and staggered layouts, the result passes a visual inspection from standing height, and sometimes even closer.
Many interior design enthusiasts appreciate the ability to mix plank widths or tile sizes within the same product line, creating custom herringbone, basketweave, or Versailles patterns without the labor cost of cutting real stone. Paint-grade trim and cabinetry updates can then elevate the whole space without replacing countertops or backsplashes immediately.
Popular Stone-Look Styles and Design Options
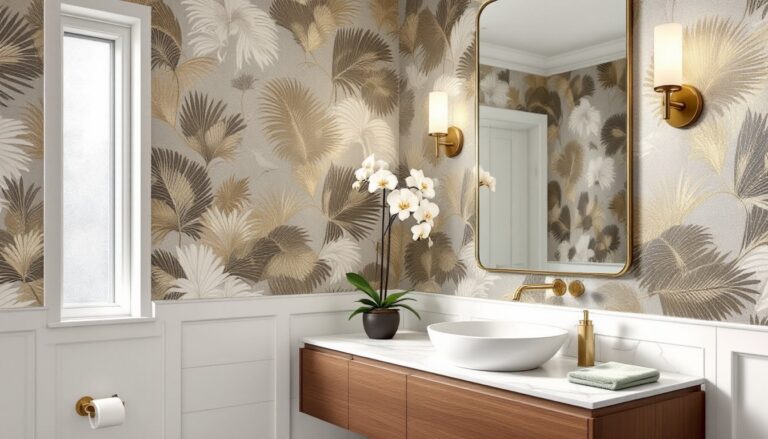
Marble-look LVT leads sales in contemporary and transitional kitchens. Carrara and Calacatta replicas feature soft gray or gold veining on white or cream backgrounds, pairing well with white shaker cabinets and quartz countertops. Honed finishes reduce glare under pendant lighting.
Slate-look tiles bring darker, layered tones, charcoal, graphite, russet, that hide dirt and complement industrial or rustic design schemes. The split-face texture adds grip, which helps in kitchens prone to wet floors.
Travertine and limestone styles offer warm beiges and taupes with subtle fossil marks and color variation. These work in farmhouse, Mediterranean, or French country kitchens where natural imperfection is part of the aesthetic.
Concrete and terrazzo looks have grown in popularity for modern minimalist spaces. Large-format 24″×48″ planks mimic poured concrete with micro-aggregate or speckled patterns, while terrazzo LVT incorporates colorful chips in a neutral base.
Most manufacturers release collections with 8 to 12 color variations per style, allowing homeowners to blend multiple shades in a single installation for a more authentic, non-repeating appearance. Some lines also include matching stair nosing, reducer strips, and T-molding in stone patterns for seamless transitions.
How to Choose the Right LVT Stone Flooring for Your Kitchen
Start with subfloor compatibility. LVT requires a flat surface with no more than 3/16″ variance over a 10-foot span. Concrete slabs may need self-leveling compound: wood subfloors should be minimum 5/8″ plywood or OSB, securely fastened and free of squeaks.
Next, decide on installation method:
- Click-lock (floating): No adhesive, fast install, removable if moving. Requires underlayment with moisture barrier on concrete. Can telegraph minor subfloor imperfections.
- Glue-down: Thin profile, very stable, ideal over radiant heat. Needs trowel-applied adhesive and a committed layout. Removal is labor-intensive.
- Loose-lay: Friction-grip backing, no glue or locking. Works on smooth surfaces but can shift under heavy appliances.
For kitchens, click-lock rigid-core LVT offers the best balance of DIY-friendliness and performance. The SPC (stone-plastic composite) core is dimensionally stable, dent-resistant, and compatible with most subfloors.
Thickness matters: 5mm to 6mm products feel solid underfoot and resist telegraphing minor subfloor flaws. Thinner 2mm to 3mm glue-down tiles work well over perfectly smooth concrete but can show every dip and seam in plywood.
Check the warranty. Residential warranties range from 10 years to lifetime, with commercial ratings indicating heavier wear resistance. Read the fine print on water damage claims, some exclude “standing water for extended periods,” which is vague but worth noting.
Finally, order 10% extra for cuts, waste, and future repairs. Dye lots can shift between production runs, making exact color matches difficult years later.
Installation Tips and DIY Considerations
Acclimate the flooring for 48 hours minimum in the room where it’ll be installed, with boxes opened and planks spread out. Vinyl expands and contracts with temperature, and skipping this step can cause gapping or buckling.
Remove baseboards, not trim. Undercutting door casings with an oscillating multi-tool allows planks to slip underneath for a cleaner look. Leave a 1/4″ expansion gap around all perimeter walls, islands, and fixed cabinetry, cover it with quarter-round or baseboard later.
Layout strategy: Dry-lay the first three rows before committing. Stagger end joints by at least 6 inches to avoid H-patterns. Start walls parallel to the longest sight line (usually the entry or main walkway) to minimize the visual impact of any out-of-square walls.
For click-lock systems, engage the long side first at a shallow angle, then press down to lock the short end. A tapping block and pull bar prevent damage to the tongue-and-groove edges. Don’t force planks, if they don’t click smoothly, check for debris or subfloor lips.
Cutting requires a utility knife with a sharp hook blade for scoring and snapping, or a vinyl tile cutter for repetitive straight cuts. A jigsaw with a fine-tooth blade handles curves around cabinets and pipes. Wear safety glasses and a dust mask if using power saws, vinyl dust is fine and irritating.
Undercut transitions carefully. T-molding between kitchen and adjacent rooms should sit in a routed channel or surface-mount track, not glued directly to LVT.
Permit check: Flooring replacement is typically cosmetic and doesn’t require a permit, but if you’re also repairing subfloor joists or altering floor height significantly, consult local building codes. If the kitchen is part of a larger remodel involving plumbing or electrical, coordinate inspections accordingly.
Many home improvement guides recommend hiring a pro for the first room to learn techniques, then tackling additional spaces solo. If the kitchen has intricate tile patterns, multiple transitions, or a tight deadline, a professional installer may complete the job in one day versus a weekend DIY struggle.
Post-install care: Wait 24 hours before moving appliances back. Use felt pads under table and chair legs. Place mats at sinks and entry doors to capture grit and water before it reaches the floor.
If a plank gets damaged later, click-lock systems allow individual pieces to be popped out and replaced, another reason to store leftover material. Glue-down repairs require cutting out the damaged section and gluing in a new tile, which is trickier but still manageable with a heat gun and putty knife.
Radiant heat compatibility: Most rigid-core LVT works with radiant floor heating up to 85°F surface temperature. Verify manufacturer specs and use a programmable thermostat to avoid overheating, which can cause discoloration or adhesive failure.
For DIYers tackling a 200-square-foot galley kitchen, expect 6 to 10 hours of labor with click-lock LVT, including prep, layout, cutting, and trim. Larger open-plan kitchens or intricate layouts with islands and diagonal runs will take longer. Budget time for subfloor repairs, old vinyl or linoleum may need scraping, and squeaky boards should be screwed down before starting.
Resources like Houzz showcase finished kitchens with LVT in various styles, helping homeowners visualize layout patterns and color pairings before ordering materials.